I had no idea how complicated it would be to make a bat amigurumi. And, actually, the head and body were a cinch... it was the wings that got a little complicated. I knew I didn't want to spend the time trying to come up with crocheted wings, but the felt I have is rather limp. There was also the problem of attatching the wings to the body... something I should have thought about before stuffing and closing the body and attaching it to the head.

My solution: Make crocheted arms for the bat with long tails for sewing. Double up the wings and sew some green craft wire into the wings along the top edge, hiding the stitches by sewing the crocheted arms over the location of the wire. I desperately need some lessons on sewing and embroidering, as I feel my wing edges are quite messy. The wings attach to the back where the arms are and near the bottom of the wings. This was sort of an afterthought when I realized how floppy the whole thing was. I cut two little slits in the front piece of felt of each wing using very tiny and very sharp sewing scissors. In retrospect, I would have cut these before sewing the wings together. After attaching the wings to the back at the arms, I ran the remaining tail through the slits and attached the wings further down the back.

It would be difficult to actually sew on the wings while still crocheting the bat's body because they run most of the length of his back, so maybe my "mistake" was actually the most logical way to put this critter together.
OK, here's my attempt at providing a pattern for the crocheted parts:
~~~~~~~~~~~~~~~~~~~~~~~~~~~
Head
Note: R1 is actually the bat's nose rather than the top of his head.
R1: ch 2, 3 sc in second ch from hook
R2: 2 sc in each (6 sts)
R3: 2 sc in each (12 sts)
R4: sc 1, 2 sc repeated 6 times (18 sts)
R5: sc 2, 2 sc repeated 6 times (24 sts)
R6: Sew on nose and add pony bead eyes about 8 stitches apart, sc 24 (24 sts)
R7-9: sc 24
R10: sc 2, dec 1 (18 sts)
R11: sc 18
R12: sc 1, dec 1 (12 sts)
R13-14: sk 1, sc 1 until you can close it off.
~~~~~~~~~~~~~~~~~~~~~~~~~~~~~~~~~~~~~~~~~~~~~~~
Ears (make 2)
R1: ch 5
R2: turn, skip one stitch and sc back to the beginning of the chain; tie off and leave tail for sewing ears to head.
~~~~~~~~~~~~~~~~~~~~~~~~~~~~~~~~~~~~~~~~~~~~~~~~
Body
R1: ch 2, 7 sc in second chain from hook
R2: 2 sc in each (14 st)
R3: sc 1, 2 sc, repeated 7 times (21 st)
R4-7: sc 21
R8: sc 6, dec 1, repeated 3 times (18 sts)
R9-13: sc 18
R14: sc 5, dec 1, repeated 3 times (15 sts)
R15: sc 4, dec 1, repeated 3 times (12 sts)
R16: sk 1, sc 1, repeated 6 times (6 sts) tie off, leaving tail for sewing body to head.
~~~~~~~~~~~~~~~~~~~~~~~~~~~~~~~~~~~~~~~~~~~~~~~~~
Arms (make 2)
R1: ch 14
R2: turn and sl st 12 starting from the second chain from hook, then sc 1. Tie off and leave long tail for sewing wings to back.
~~~~~~~~~~~~~~~~~~~~~~~~~~~~~~~~~~~~~~~~~~~~~~~~~
Wings
Draw desired wing shape on paper, then cut out and use it as a pattern to make 4 wing shapes in beige felt. If you've got any pen marks on the wings, be sure to hide those sides on the inside of your wings. Measure out two pieces of craft wire so that when they are folded in half, they are just a little shorter than the top edge of your felt wings. Use a needle and thread to sew each wire to the inside of a wing. Make sure to sew the second wire to the opposite side of the second wing... since they should be mirror images of each other. Then sew each crocheted arm to the wings, opposite the wire side, covering any messy stitches from where you sewed the wire. Cut two small slits in each wing front about an inch below the base of the crocheted arms. Use brown embroidery floss to sew wing fronts to wing backings.
~~~~~~~~~~~~~~~~~~~~~~~~~~~~~~~~~~~~~~~~~~~~~~~~~~
Attaching
Consider using straight pins or safety pins to position the wings where you want them. Next, using a smaller crochet hook (like D) weave the tails into the bat's back to attach the wings. String the remaining tail through the slits you cut in the wing and attach it to a lower point on the bat's back.
Brown bat may look a little frumpy at this point, but his wings can be reshaped by gently bending the wire to the desired angle.


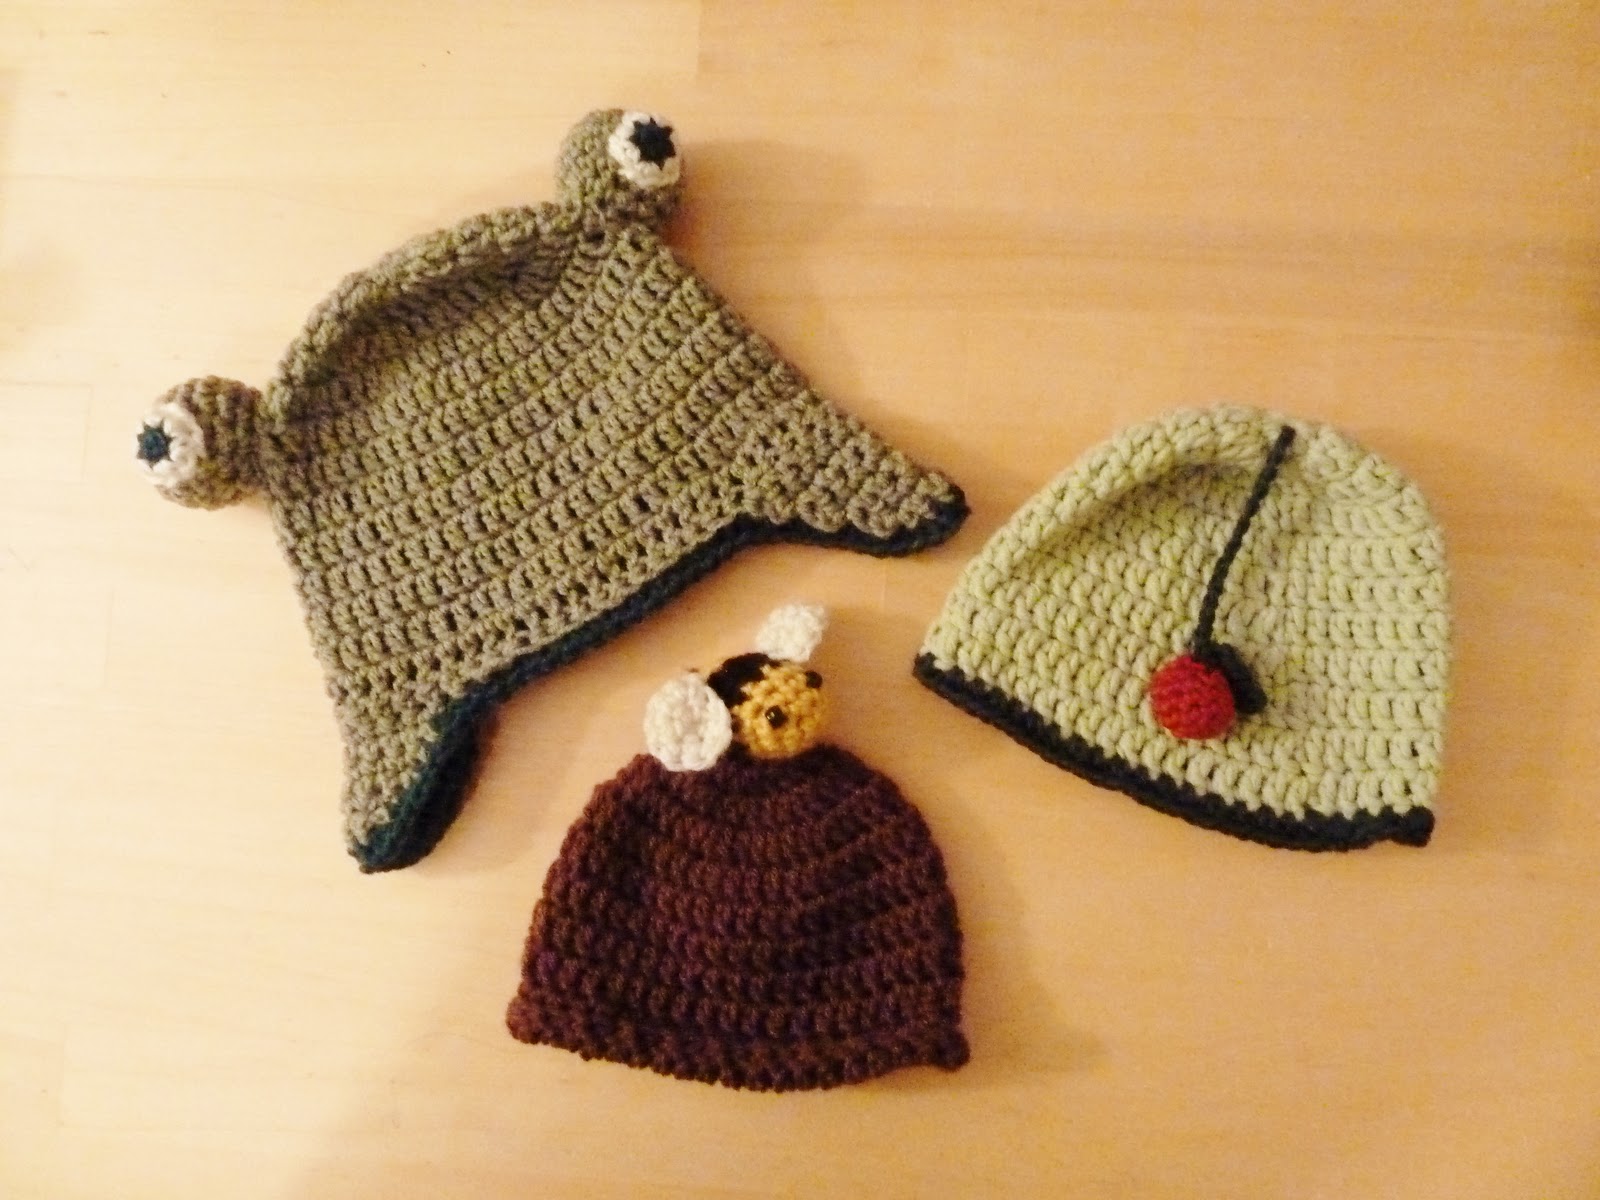


 Just for fun, I thought I'd give sweater frog a ride. Too bad, they're going to separate people.


 I'm about two months late... and I haven't made the back spine in navy yet, becaue I haven't bought navy yarn yet....


 The above rattle has jingle bells crocheted into a middle row about five stitches apart. It's supposed to be a tambourine for Stephen. He only plays with it occasionally though :-(


 My friends have four children, each with a unique "nature-y" name. Anna Rain will be celebrating her 4th birthday tomorrow, and I wanted to make her a little gift that reflected her pretty middle moniker.
  This is what I came up with...

 It would be difficult to actually sew on the wings while still crocheting the bat's body because they run most of the length of his back, so maybe my "mistake" was actually the most logical way to put this critter together.


